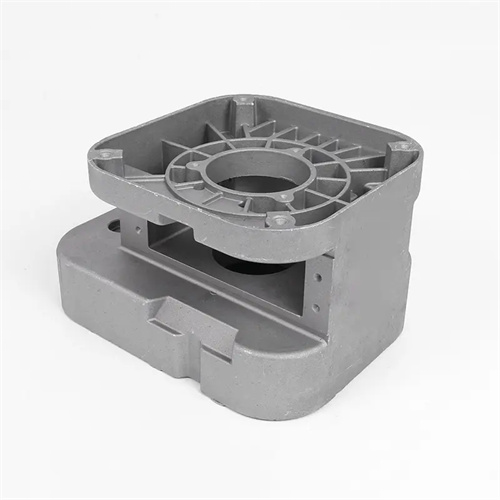
Die-casting mold inclined pin design
The design of a diagonal pin (also known as an inclined guide pin) in a die-casting mold is the most commonly used structural form in mechanical core-pulling mechanisms. Through relative motion during mold opening, it converts the mold-opening force into a lateral core-pulling force, thereby enabling the core to be extracted. The rationality of the diagonal pin design directly impacts the core-pulling mechanism’s operational stability, core-pulling accuracy, and mold life. Therefore, meticulous design is required, encompassing multiple aspects, including material selection, geometric parameters, fit accuracy, and installation method. The diagonal pin design must meet the required core-pulling force and distance, while also ensuring a compact structure, ease of fabrication, and convenient maintenance. This is a critical aspect of mold design.
The material selection and heat treatment process for the angled pin must meet the requirements of high strength, high wear resistance, and good toughness. Because the angled pin is subjected to bending and shear stresses during operation, as well as sliding friction with the slider, high-strength alloy structural steel or mold steel, such as 40Cr, Cr12MoV, or H13 steel, is required. 40Cr steel, after quenching and tempering (hardness 28-32 HRC), exhibits excellent overall mechanical properties and is suitable for applications with low core pulling forces. Cr12MoV steel, after quenching and tempering (hardness 58-62 HRC), exhibits significantly improved wear resistance and is suitable for molds with high core pulling forces or large-scale production. H13 steel, with its excellent thermal fatigue resistance, is suitable for high-temperature alloy die-casting molds. Material selection must be determined based on the core pulling force, production batch, and operating temperature to ensure the angled pin has a sufficient service life.
The core design of the angled pin’s geometric parameters is crucial, primarily encompassing diameter, length, angle of inclination, and head shape. The pin’s diameter must be calculated based on the core-pulling force using the formula d = √(4F/(π[σ]bend)), where F is the core-pulling force and [σ]bend is the material’s allowable bending stress (120 MPa for 40Cr and 200 MPa for Cr12MoV). For example, when the core-pulling force is 5000N, the diameter of the 40Cr angled pin must be ≥√(4×5000/(3.14×120))≈7.3mm, but is typically 8mm. The angle is typically 15°-25°. A smaller angle increases the pin’s length and mold size, while a larger angle increases the mold opening force and the bending moment acting on the pin, potentially causing it to bend or break. The head shape is generally designed to be hemispherical or conical to reduce the contact stress with the slider and reduce wear. The fitting clearance between the head and the slider needs to be controlled at 0.02-0.05mm to ensure smooth movement.
The calculation of the bevel pin’s length requires considering the core-pulling distance and the tilt angle. The formula is L = S/sinα + L1 + L2, where S is the core-pulling distance, α is the tilt angle, L1 is the length of the fixed end of the bevel pin (generally 2-3 times the diameter), and L2 is the head allowance of the bevel pin (usually 10-15mm). For example, for a bevel pin with a core-pulling distance of 25mm, a tilt angle of 20°, and a diameter of 10mm, its length L = 25/sin20° + 2×10 + 12 ≈ 73.1 + 20 + 12 = 105.1mm, which is actually 106mm. The bevel pin must be installed so that its axis is perpendicular to the direction of movement of the slider. The fixed end should be secured to the fixed die plate with an interference fit or bolts, with a length of at least twice the diameter, to ensure a secure installation. The bevel pin should have a clearance fit (H7/f7) with the guide hole in the slider, and the guide hole length should be 3-5 times the diameter to ensure accurate guidance of the bevel pin.
Verifying the strength of the canted pin is a crucial step in the design process. It is crucial to ensure that it does not bend or break under the maximum core-pulling force. The verification formula is σ bend = 32FL/(πd³) ≤ [σ] bend, where F is the core-pulling force, L is the cantilever length of the cantilever pin, d is the diameter, and [σ] bend is the allowable bending stress of the material. For example, for a 40Cr cantilever pin with a core-pulling force of 8000N, a 10mm cantilever pin diameter, and an 80mm cantilever length, σ bend = 32 × 8000 × 80 / (3.14 × 10³) ≈ 652 MPa, which is significantly greater than the allowable bending stress of 120 MPa for 40Cr. In this case, the diameter should be increased to 16mm, and σ bend is recalculated to ≈ 32 × 8000 × 80 / (3.14 × 16³) ≈ 127 MPa, which is closer to the allowable value and meets the strength requirements. For molds that are used for a long time, fatigue strength verification is also required to consider the influence of alternating stress during the core pulling process to ensure that the service life of the inclined pin reaches the expected production batch.
