Main dimensions of die casting mold inserts
The key dimensions of a die-casting mold insert include length, width, height, and the dimensions of the mating parts. These parameters must be determined based on the molding requirements of the die-casting part, the mold’s overall structure, and the processability. The insert’s length and width are typically determined based on its installation position in the mold and the size of the molding area. They must ensure that the insert fully covers the desired molding area while leaving sufficient clearance (typically 5-10mm per side) for screw holes and locating pins. For example, when molding a complex 100mm x 80mm boss on a die-cast part, the insert’s length and width should be designed to be 110mm x 90mm to ensure both the molding area and space for mounting and connection. The insert’s height is determined by the cavity depth or core height. For cavity inserts, the height is the sum of the cavity depth plus the mold plate thickness and the height of the fixed portion. For core inserts, the height is the core height plus the height of the fixed portion. The total height is typically no less than 30mm to ensure adequate rigidity.
The mating dimensions between the insert and the template are crucial for ensuring assembly accuracy, including the flatness, perpendicularity, and dimensional tolerances of the mating surfaces. The mating surfaces of the insert (typically the bottom and sides) are precision ground to a flatness tolerance of no more than 0.005mm/m and a perpendicularity tolerance of less than 0.01mm/100mm to ensure a tight fit with the template. The dimensional tolerances of the mating surfaces are typically H7 or h7. For example, an insert with a width of 100H7 (+0.035/0) corresponds to a template mounting slot dimension of 100H7 (0/-0.035). This clearance is controlled between 0-0.07mm to ensure smooth assembly while preventing excessive clearance from causing insert movement. For inserts that must withstand significant lateral forces (such as side-pulling inserts), the clearance should be reduced to 0-0.03mm, and guide keys should be used to assist with positioning and enhance stability.
The dimensions of the insert’s molding area must be precisely calculated based on the die-casting part’s dimensional requirements and die-casting shrinkage. The shrinkage of die-cast alloys varies depending on the material: 0.8%-1.2% for aluminum alloys, 0.5%-0.8% for zinc alloys, and 0.6%-1.0% for magnesium alloys. When designing the insert’s molding dimensions, add the shrinkage allowance to the nominal dimensions of the die-casting. For example, for a φ50mm hole in an aluminum alloy die-casting, the corresponding core diameter on the insert should be 50mm x (1 + 1%) = 50.5mm. For areas requiring dimensional accuracy (such as IT10), the mold manufacturing tolerance must be added to the shrinkage allowance—typically 1/3-1/2 the die-casting’s dimensional tolerance—to ensure the final dimensions of the die-casting are within acceptable limits. Furthermore, structural dimensions such as corner fillets and tapers of the insert’s molding area must align with the die-casting design. The fillet radius is generally 0.1-0.2mm larger than the die-casting’s required radius to compensate for shrinkage.
The dimensions of the mounting elements of the insert must ensure connection strength and positioning accuracy, including the location and size of the screw and pin holes. The screw hole diameter is determined by the insert size. For small inserts (less than 100mm x 100mm), M6-M8 hexagon socket head screws can be used; for large inserts, M10-M16 screws are required, with at least two screws symmetrically arranged. The screw hole depth should be 1.5-2 times the screw diameter. For example, the hole depth for an M8 screw should be 12-16mm to ensure sufficient connection strength. The pin hole is typically located diagonally from the screw hole, with a diameter 0.01-0.02mm larger than the pin and a depth of two-thirds the pin length to ensure reliable positioning. For example, when using a φ8mm dowel pin, the pin hole diameter should be 8.01-8.02mm and the depth should be 16-20mm (for a 25mm pin length).
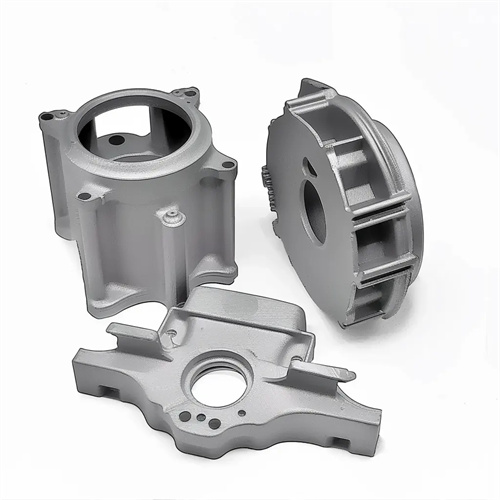
The overall dimensions of the insert must also take into account heat treatment deformation and machining allowance. Inserts will deform somewhat after quenching, so sufficient grinding allowance should be reserved during rough machining—typically 0.3-0.5mm per surface—to allow for dimensional correction via grinding after heat treatment. For inserts with complex shapes, segmented machining and multiple heat treatments can be used to minimize the impact of deformation on dimensional accuracy. Furthermore, the insert dimensions must align with standard mold components, such as the installation position of guide pins and sleeves and the distribution of push rod holes, to ensure interoperability with other components. During the design process, 3D modeling software can be used for virtual assembly to check insert dimensions for interference with surrounding components and optimize dimensional parameters in advance. Once the key dimensions of the insert are determined, detailed part drawings should be prepared, with tolerances for key dimensions and form and position tolerances noted. This provides a basis for machining and inspection, ensuring the insert meets mold assembly and operational requirements.
