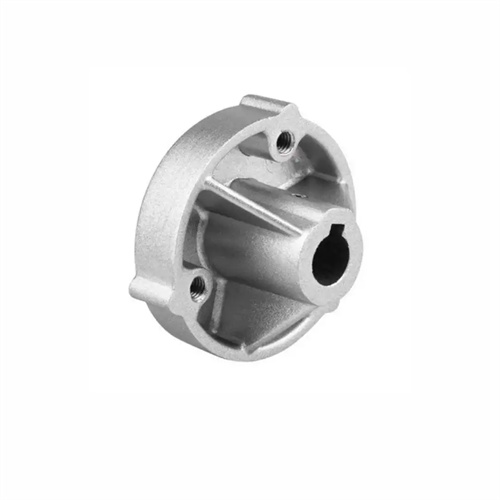
Axial Fitting of Structural Parts in Die Casting Dies
The axial fit of die-casting mold components refers to the positioning and dimensional relationship of the components in the axial direction. The quality of its design and assembly directly impacts the mold’s axial dimensional accuracy, stress response, and operational stability. Axial fit ensures accurate axial positioning of the components to prevent displacement caused by axial forces during the die-casting process. Common positioning methods include shoulder positioning, retaining ring positioning, step positioning, and screw tightening. Shoulder positioning is suitable for shaft parts. The clearance between the shoulder and the part end face must be controlled within 0.01-0.02mm to ensure accurate axial positioning. Retaining ring positioning is often used in applications with lower axial forces. The clearance between the retaining ring and the part end face should be no greater than 0.03mm, and the axial tolerance of the retaining ring groove is H11 to ensure effective installation and positioning of the retaining ring. For example, the axial positioning of the core in the mold plate uses the fit of the shoulder and the mold plate end face. The axial tolerance of the shoulder is H9, and the axial tolerance of the mold plate mounting shoulder is H9. The clearance is 0-0.052mm, ensuring both accurate positioning and easy assembly.
Controlling axial clearance is key to ensuring reliable axial movement or fixation of parts. Parts with different functions require different axial clearances. For parts requiring axial movement (such as push plates and sliders), the axial clearance must be small enough to ensure accurate movement while preventing jamming. The axial clearance between the push plate and the movable platen is typically controlled at 0.03-0.05mm, and the axial clearance between the slider and the guide rail is 0.02-0.04mm. For fixed parts (such as inserts and support plates), the axial clearance should be controlled at 0.01-0.03mm. This clearance is eliminated through the preload of bolts or screws to ensure a tight fit. For example, the axial fit between the support plate and the movable platen is achieved through the preload of 4-M16 bolts, with a flatness error of no more than 0.01mm/m on the mating surfaces. This ensures effective force transmission and prevents deformation of the platen due to excessive local forces.
The calculation of the dimension chain and the allocation of tolerances for axial fit are the basis for ensuring the overall axial dimensional accuracy. The axial dimension tolerances must be reasonably allocated to each part according to the assembly requirements of the mold. For example, the mold’s closing height tolerance is ±0.1mm, and this tolerance must be allocated to the thickness tolerances of parts such as the fixed die plate, fixed die plate, movable die plate, support plate, and gasket. The thickness tolerance of each part is usually ±0.03-±0.05mm, and cumulative control is used to ensure that the total closing height is within the tolerance range. For axial dimensions with a matching relationship, such as the matching of the push plate stroke and the length of the reset rod, the axial interference of the reset rod in the closed mold state must be guaranteed to be 0.02-0.05mm to ensure that the push plate is fully reset to avoid deformation of the die casting or damage to the mold due to insufficient reset. When calculating the dimension chain, the extreme value method or probability method must be used to ensure that the cumulative error of each part does not exceed the design allowable value.
Axial force analysis and strength verification are crucial for ensuring safe mold operation. Calculating the stress and deformation of parts under axial forces is crucial to ensure the material’s allowable stress is not exceeded. During the die-casting process, the mold is subjected to axial forces including clamping force, injection force, and ejection force. These forces are transmitted through the axial mating surfaces, so the contact strength of the mating surfaces must meet requirements. For example, a φ50mm core can experience an axial force of up to 50kN under injection force. The contact stress between the core and die plate must be less than 300MPa (the allowable contact stress for 45 steel). Calculations are performed to determine the mating surface area (at least 1963mm²) to ensure plastic deformation is avoided. For parts subject to significant axial forces, such as large inserts, the number and diameter of axial retaining bolts must be increased, and the shear and tensile strengths of the bolts must be verified to ensure they do not break or loosen under maximum axial forces.
The assembly process and inspection methods for axial fit directly impact fit quality. Reasonable process methods must be employed during assembly to ensure axial positioning accuracy and clearance requirements. For parts with shoulder positioning, the flatness and perpendicularity of the shoulder and positioning end face must be checked before assembly, and grinding performed if necessary to ensure a minimum 90% contact area. During assembly, a dial indicator can be used to monitor the axial position of the part, and adjustments can be made by tapping or pressing until the design requirements are met. For example, when assembling a core, a dial indicator can be fixed to the mold plate, with the probe touching the core end face. During the press-fit process, the axial displacement of the core can be monitored to ensure that the parallelism error between the core end face and the mold plate plane is within 0.01mm. After assembly, the axial clearance should be checked with a feeler gauge. For fixed-fit parts, a feeler gauge (0.03mm) should not be inserted; for kinematic-fit parts, the clearance should meet the design requirements. Furthermore, the performance of the axial fit should be verified through trial molds, observing the axial dimensional and form errors of the die-cast part. Based on the trial mold results, necessary adjustments should be made until production requirements are met.
