Fit and precision of shaft and hole of die casting mold structural parts
The fit and precision of the shaft and hole in die-casting mold components directly impact the mold’s assembly quality and performance. Components with different functions require different fits and precision levels to meet varying requirements for motion, positioning, and sealing. For shaft-hole fits requiring relative motion (such as guide pins and guide sleeves, or push rods and push rod holes), a clearance fit is typically used, with the fit precision determined by the required motion accuracy. Guide pins and guide sleeves typically use an H7/h6 fit, with a clearance of 0.01-0.03mm, ensuring both smooth motion and precise guidance. The push rod and push rod hole use an H8/f7 fit, with a clearance of 0.03-0.07mm, ensuring flexible push rod movement while preventing backflow of molten metal. For example, a φ20mm guide pin is matched with a guide sleeve. The guide pin diameter is φ20h6 (0/-0.013), the guide sleeve aperture is φ20H7 (+0.021/0), the maximum clearance is 0.034mm, and the minimum clearance is 0.013mm, ensuring precise guidance without jamming when opening and closing the mold.
For fixed connections between shafts and holes (such as between core and template, insert and sleeve), a transition fit or interference fit is typically used to ensure joint rigidity and positioning accuracy. The core-to-plate fit is often H7/m6 or H7/k6, with the interference or clearance of the transition fit controlled within -0.015 to +0.015mm. This ensures a secure core fixation while facilitating press-fit or tap-fit installation during assembly. For insert-to-sleeve fits requiring higher positioning accuracy, a transition fit of H7/n6 can be used, with an interference of 0-0.03mm to prevent the insert from loosening under high pressure. For example, a φ50mm core is matched with a template, the core diameter is φ50m6 (+0.025/+0.012), the template aperture is φ50H7 (+0.025/0), the maximum interference is 0.025mm, and the minimum clearance is 0, ensuring that there is no radial looseness after the core is installed, while avoiding cracking of the template due to excessive interference.
The dimensional accuracy of shafts and holes is fundamental to ensuring proper fit. Appropriate dimensional tolerances must be determined based on the fit requirements and part function. The dimensional accuracy of shafts and holes in moving parts is typically IT6-IT8, while that of fixed parts is IT7-IT9. Guide components such as guide pins and guide bushings must meet IT6 dimensional accuracy. For example, the diameter tolerance of a φ30mm guide pin is h6 (0/-0.016), ensuring consistent fit clearance. Ejection components such as push rods and reset rods must meet IT7 dimensional accuracy, with a diameter tolerance of h7 (0/-0.021), ensuring flexibility while reducing processing costs. For hole-type components, the dimensional accuracy of the guide bushing aperture is IT7 (H7), the mounting hole in the template is IT8 (H8), and the mounting hole in the insert is IT7 (H7). For example, the φ16mm push rod hole has a dimensional tolerance of H8 (+0.027/0), and when matched with a φ16h7 (0/-0.018) push rod, the maximum clearance is 0.045mm and the minimum clearance is 0.018mm, meeting the dual requirements of push rod movement and anti-overflow.
The geometric accuracy of shafts and holes significantly impacts fit performance and must be matched with dimensional accuracy to avoid uneven clearance or binding caused by excessive geometric errors. The straightness error of shaft parts should be no greater than 0.01mm/m, and the roundness error should be no greater than 1/2 of the dimensional tolerance. For example, for a φ25mm guide post, the roundness error should be controlled within 0.006mm (dimensional tolerance 0.013mm). The cylindricity error of hole parts should be no greater than 1/2 of the dimensional tolerance, and the perpendicularity error (relative to the end face) should be no greater than 0.01mm/100mm. For example, the cylindricity error of a guide sleeve hole should be no greater than 0.01mm for IT7 accuracy to ensure uniform contact with the guide post. Furthermore, the perpendicularity error of the shaft shoulder to the axis, and the perpendicularity error of the hole end face to the axis, must be controlled within 0.01mm/100mm to avoid additional torque during assembly, which could affect the service life of the part. For example, if the verticality error of the core shoulder exceeds 0.02mm/100mm, it will cause the core to fit unevenly with the template after installation, resulting in eccentric load under the action of die-casting pressure, exacerbating the wear and deformation of the core.
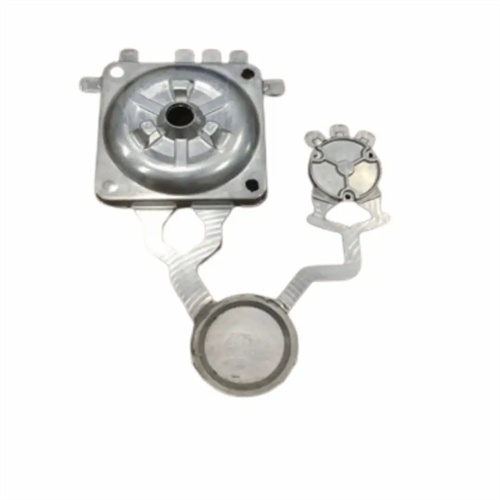
The surface quality of the shaft and hole significantly impacts fit performance and wear resistance. Parameters such as surface roughness and hardness must meet design requirements. The surface roughness of the shaft-hole in a moving fit must reach Ra0.4-0.8μm, for example, the outer diameter of the guide pin and the inner bore of the guide sleeve should reach Ra0.4μm to reduce friction and wear. For fixed fits, the surface roughness can be appropriately reduced to Ra1.6-3.2μm, such as Ra1.6μm between the core and the mold plate, to ensure a tight fit. The working surfaces of shaft components require hardening. Moving parts such as guide pins and push rods should achieve a surface hardness of HRC55-62, while forming parts such as cores should achieve a surface hardness of HRC45-50 to enhance wear and fatigue resistance. For example, after quenching and grinding, the surface of the guide pin achieves a hardness of HRC58-62 and a surface roughness of Ra0.4μm. This, combined with the bronze guide sleeve (Ra0.4μm), creates a superior friction pair with a service life exceeding 100,000 cycles. The edges of the shaft-hole mating must be blunt (C0.5-C1) to avoid scratching the mating surface or causing stress concentration during assembly.
